…or how this blog is built and deployed.
Introduction
I’m using the tools and methods described in this post because I wanted to learn more about Hugo, GitLab CI and Docker. I don’t claim this is the best way of combining these technologies, or that everyone should do it this way.
I wanted to create a blog and publish content in a way that felt fun, and at the same time learn something new.
Hugo is a static website generator written in Go. I installed and played with both Wordpress and Ghost, but ultimately settled on Hugo as I enjoyed the workflow more. I wanted to create my posts in Markdown, using the text editor of my choosing, and then generate static content. Having my content under version control was also a goal. I’m sure there are ways to achieve this same workflow in other static content generator tools and frameworks, but for now I am enjoying this one :)
Overview
In this post I am going to describe how I deploy new content to my blog. The basic components are as follows:
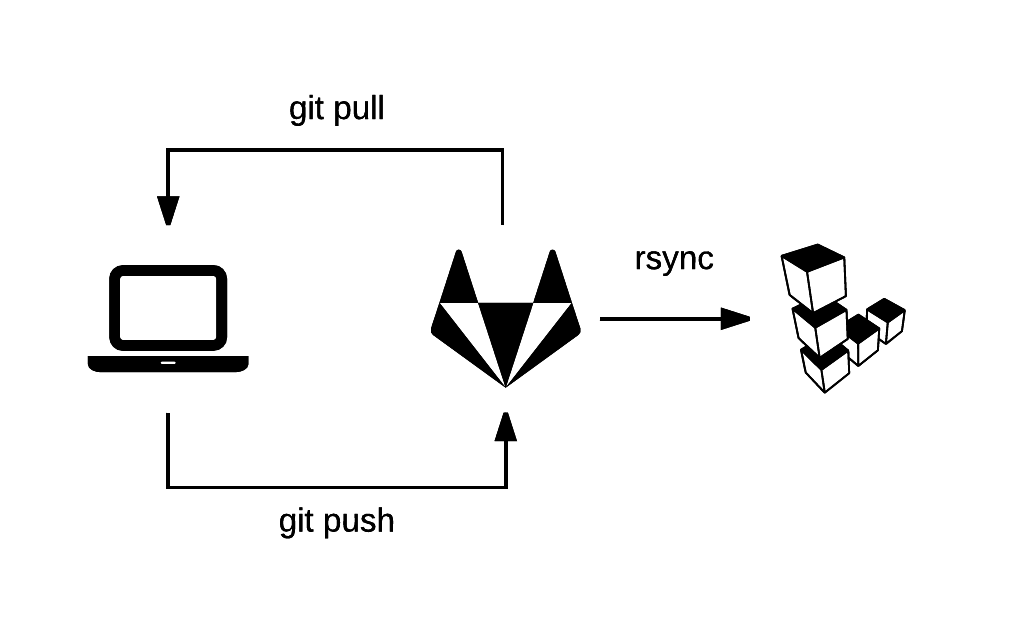
- The blog is hosted on a Linode machine.
- The blog content is hosted in a private git repo at GitLab
- I keep a local copy of the git repo on whichever PC, laptop, server I am using at the moment.
- I add or edit content in the local git repo.
- Drafts and works in progress are maintained in separate branches.
- Content ready for publishing is merged into my master branch.
- When content is merged into master and pushed to my GitLab repo a GitLab CI pipeline is triggered.
- The GitLab CI pipeline consists of a build phase and a deploy phase.
- The build phase pulls a docker image from Docker Hub which contains the necessary software required to run Hugo and generate my static content.
- The deploy phase takes the newly generated content and copies it to my Linode box which is serving my blog.
While I will go into specifics on how I accomplished this, I am not going to go over the basic fundamentals of each of these technologies. You will find that I will link to helpful posts and articles where needed. Also it may be useful to know that while I described Hugo as being written in Go, I have not (yet) needed to play with it’s source code, and so there is absolutely no requirement on needing to know anything about Go.
Components
GitLab
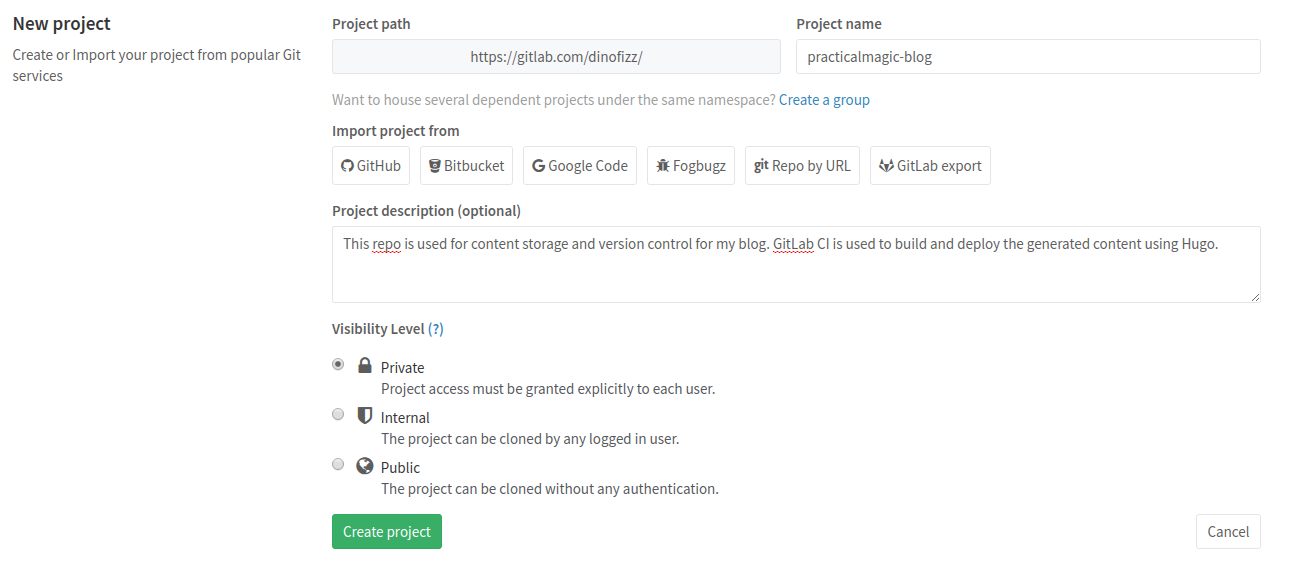
First I had to set up a new repository at GitLab.com.
GitLab is a provider of software repository management tools. Products range from free and open source products to non-free enterprise products as well as a web hosted repository service at GitLab.com similar to GitHub.com. The big differentiator being that GitLab allows for unlimited free private repositories with unlimted collaboraters. Previously I was using BitBucket for my private repos but I found the interface to be lacking in comparison with GitLab.
Using the GitLab.com web interface I created a new repo for my blog.
Local Machine Set-up: git and Hugo
Once the GitLab repo was created I cloned it to my local machine using the instructions provided when I created the repo online at GitLab.com.
Next I needed to install the latest version of Hugo. Now to be really fancy you might also want to use a Docker container to manage your Hugo installation and local development, but for now I have opted to install it directly on to my various machines from which I am created content. The Hugo docs do a great job of explaining exactly how to get Hugo on your machine so I will not cover it here, see https://gohugo.io/overview/installing/.
Note: Hugo does not come with any default themes, you will need to pick one and install it yourself: https://gohugo.io/themes/installing/. I’m using the Hugo-Octopress theme.
GitLab CI and the .gitlab-ci.yml file
GitLab.com includes a continuous integration service called GitLab CI. Once configured, code pushed to your GitLab repo automatically triggers scripted “stages” as part of a “pipeline”.
A GitLab CI pipeline is configured via a .gitlab-ci.yml file which you create and place in your git repo’s root folder. This file specifies the various pipeline stages and the scripted operations to be performed within each one.
GitLab CI supports the use of variables within your .gitlab-ci.yml file. The variables are defined in the web UI:
These variables are made available in your script as environment variables - the ${VARIABLE} items you see below.
Here is my current .gitlab-ci.yml file:
stages:
  - build
  - deploy
build:
  stage: build
  image: dinofizz/hugo
  script:
  - git submodule update --init --recursive
  - hugo -d public_html -b "${BLOG_URL}"
  cache:
    paths:
    - public_html
  artifacts:
    paths:
    - public_html
  only:
  - master
deploy:
  stage: deploy
  image: dinofizz/rsync-ssh
  script:
  - echo "${SSH_PRIVATE_KEY}" > id_rsa
  - chmod 700 id_rsa
  - mkdir "${HOME}/.ssh"
  - echo "${SSH_HOST_KEY}" > "${HOME}/.ssh/known_hosts"
  - rsync -hrvz --delete --exclude=_ -e 'ssh -i id_rsa' public_html/ "${SSH_USER_HOST_LOCATION}"
  only:
  - master
stages:
  - build
  - deploy
Build
build:
  stage: build
  image: dinofizz/hugo
  script:
  - git submodule update --init --recursive
  - hugo -d public_html -b "${BLOG_URL}"
  cache:
    paths:
    - public_html
  artifacts:
    paths:
    - public_html
  only:
  - master
script
script:
- git submodule update --init --recursive
- hugo -d public_html -b "${BLOG_URL}"
The next command is to run the Hugo binary and tell it to deploy my static content to a local folder called public_html, and set the base URL to be that as specific in the GitLab CI variable ${BLOG_URL}.
cache
  cache:
    paths:
    - public_html
artifacts
  artifacts:
    paths:
    - public_html
only
only:
  - master
Deploy
deploy:
  stage: deploy
  image: dinofizz/rsync-ssh
  script:
  - echo "${SSH_PRIVATE_KEY}" > id_rsa
  - chmod 700 id_rsa
  - mkdir "${HOME}/.ssh"
  - echo "${SSH_HOST_KEY}" > "${HOME}/.ssh/known_hosts"
  - rsync -hrvz --delete --exclude=_ -e 'ssh -i id_rsa' public_html/ "${SSH_USER_HOST_LOCATION}"
  only:
  - master
  script:
  - echo "${SSH_PRIVATE_KEY}" > id_rsa
  - chmod 700 id_rsa
  - mkdir "${HOME}/.ssh"
  - echo "${SSH_HOST_KEY}" > "${HOME}/.ssh/known_hosts"
  - rsync -hrvz --delete --exclude=_ -e 'ssh -i id_rsa' public_html/ "${SSH_USER_HOST_LOCATION}"
Linode
I won’t go into too much detail here, but suffice it to say that I am using a VPS hosted by Linode, running nginx. Both Linode and DigitalOcean have great tutorials for getting nginx running on your VPS.
In the nginx config my blog I specify the root to point to the public_html folder that is rsync’d over during the deploy stage.
Docker
In the previous section I referenced two Docker images hosted at Docker Hub, one for my build stage and one for my deploy stage. These images were created with Dockerfiles I have made available on my GitHub account (links below). My Docker Hub images are linked to my GitHub such that any pushes to the master branch in their respective repos will trigger a new build of the image at Docker Hub. This feature of Docker Hub is called “Automated Builds”.
docker-hugo
The docker-hugo repo contains the following Dockerfile:
FROM alpine:3.4
MAINTAINER [email protected]

RUN apk add --update \
    git \
    python \
    py-pip \
  && pip install pygments \
  && rm -rf /var/cache/apk/*

ENV HUGO_VERSION 0.17
ENV HUGO_BINARY hugo_${HUGO_VERSION}_linux_amd64
ENV HUGO_RESOURCE hugo_${HUGO_VERSION}_Linux-64bit

ADD https://github.com/spf13/hugo/releases/download/v${HUGO_VERSION}/${HUGO_RESOURCE}.tar.gz /tmp/

RUN  tar -xvzf /tmp/${HUGO_RESOURCE}.tar.gz -C /tmp/ \
	&& mv /tmp/${HUGO_BINARY}/${HUGO_BINARY} /usr/bin/hugo && rm -rf /tmp/hugo*
The Dockerfile describes the installation of the required packages:
- git: to perform the submodule update.
- python: required for the Pygments syntax highlighting package.
- pip: to install the latest version of Pygments from the Python Package Index
Environment variables are used to specify the version, binary name and URL for the latest Hugo binary.
docker-rsync-ssh
The docker-rsync-ssh repo contains the following Dockerfile:
FROM alpine:3.4

RUN apk --update add \
  rsync \
  openssh \
  && \
  rm -rf /var/cache/apk/*
Workflow
Now that I have described the various components which make up my dockerised Hugo content generation using GitLab CI, I will walk you through a typical workflow.
First on my local machine I create a new branch for the post I want to create:
$ git checkout -b example-post
Switched to a new branch 'example-post'
$ hugo new post/example.md
/home/dinofizz/practicalmagic-blog/content/post/example.md created
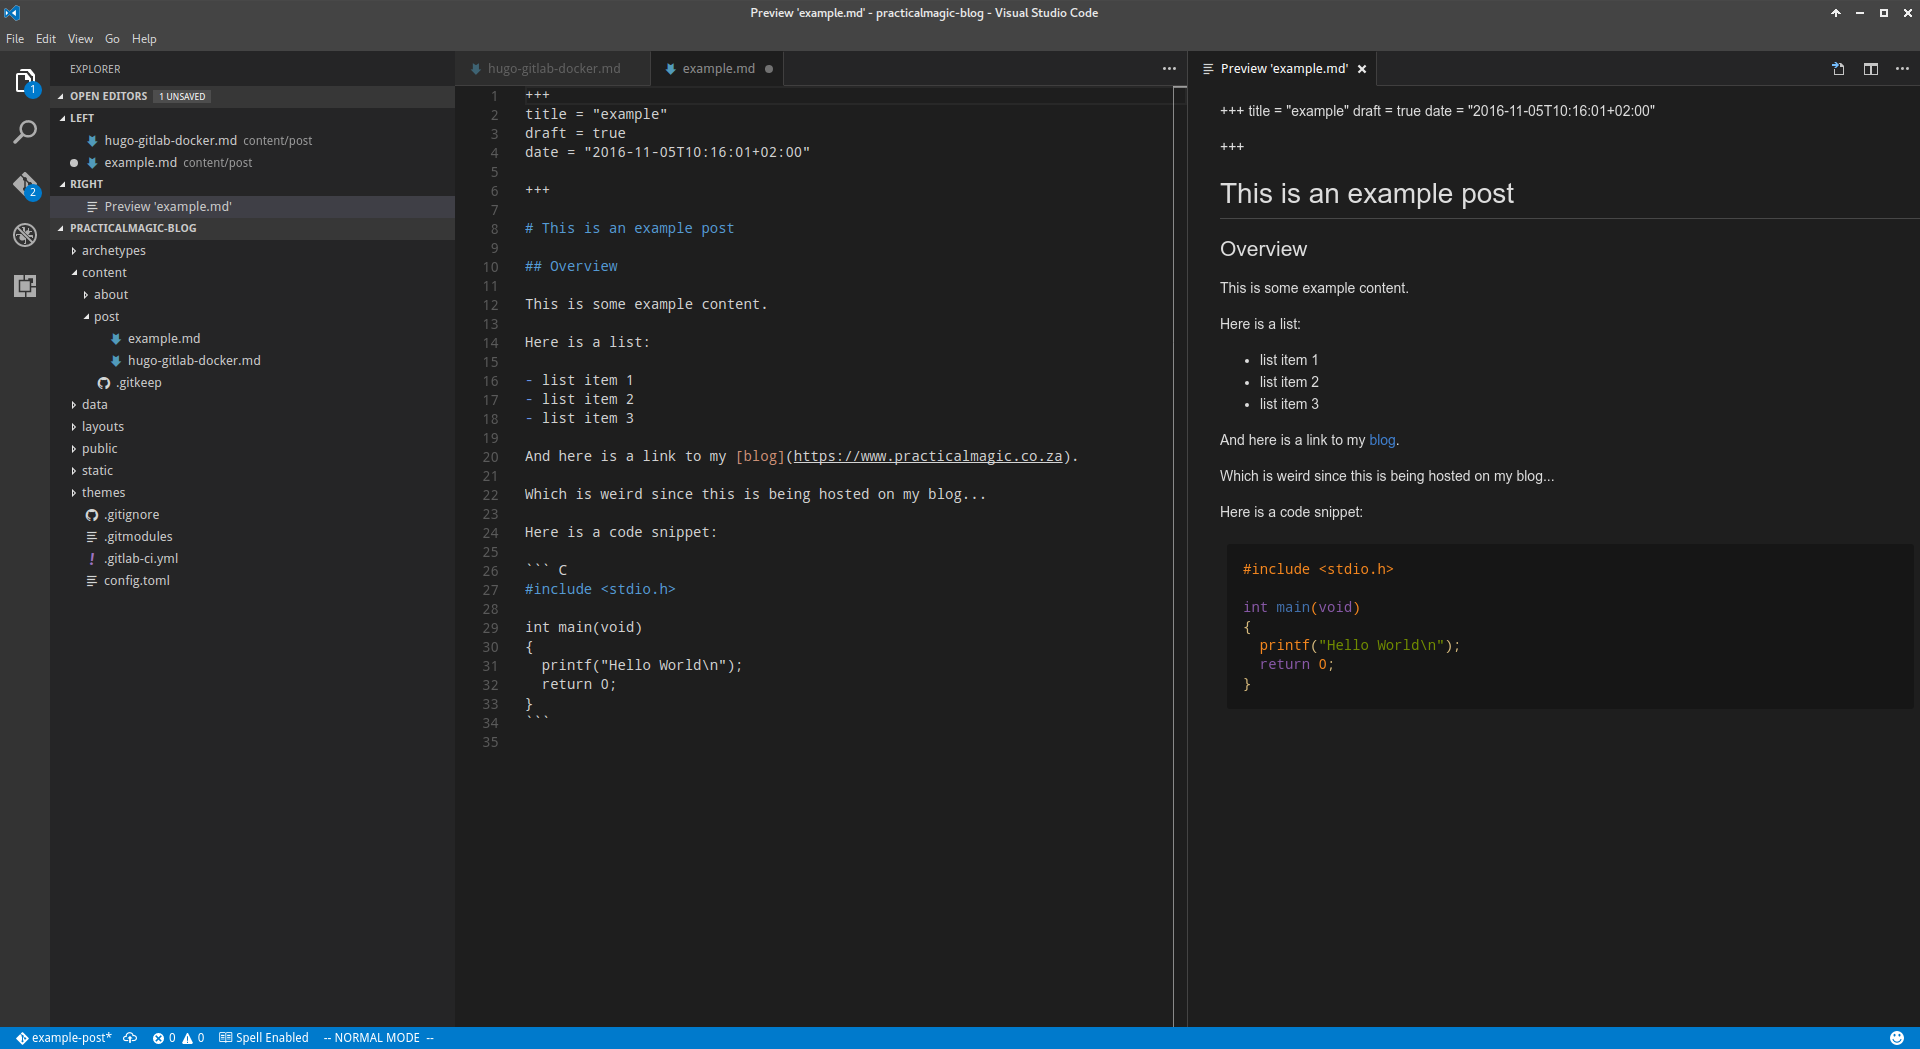
Once I’m done editing I save the file and switch back to the terminal to commit my changes. I’m happy with this work so I merge the example-post into the master branch. If this post was still a work in progress I would commit and push my changes to the example-post branch. GitLab CI is only configured to trigger the CI pipeline on pushes and merges to the master branch.
$ git status
On branch example-post
Changes not staged for commit:
  (use "git add <file>..." to update what will be committed)
  (use "git checkout -- <file>..." to discard changes in working directory)

        modified:   content/post/example.md

no changes added to commit (use "git add" and/or "git commit -a")

$ git add content/post/example.md

$ git commit -m "Adding new example post"
[example-post 2b93ff5] Adding new example post
 1 file changed, 1 deletion(-)

$ git checkout master
Switched to branch 'master'
Your branch is up-to-date with 'origin/master'.

$ git merge example-post
Updating 324f9ec..2b93ff5
Fast-forward
 content/post/example.md            |  33 +++++++++
 1 files changed, 33 insertions(+), 0 deletions(-)
 create mode 100644 content/post/example.md

$ git push origin master
Counting objects: 18, done.
Delta compression using up to 4 threads.
Compressing objects: 100% (17/17), done.
Writing objects: 100% (18/18), 152.86 KiB | 0 bytes/s, done.
Total 18 (delta 9), reused 0 (delta 0)
To gitlab.com:dinofizz/hugoblog.git
   324f9ec..2b93ff5  master -> master
Don’t pay too much attention to the commit hashes in the next few images, this workflow was constructed from several attempts to aid in getting all the screenshots
If I now switch over to my GitLab account and take a look at the “Pipeline” tab I see that GitLab has correctly identified changes to my master branch, and triggered the pipeline. The build stage is underway…
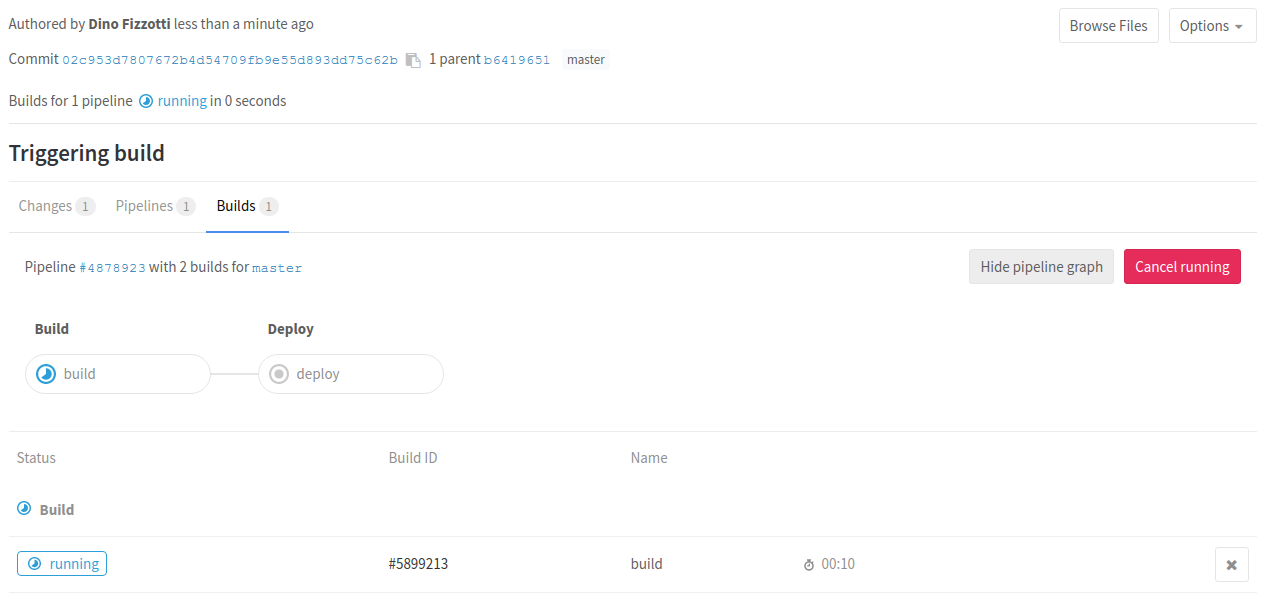
I can look at a live log of the stage, and watch it pull the Docker image from Docker Hub and run all of the scripted commands.
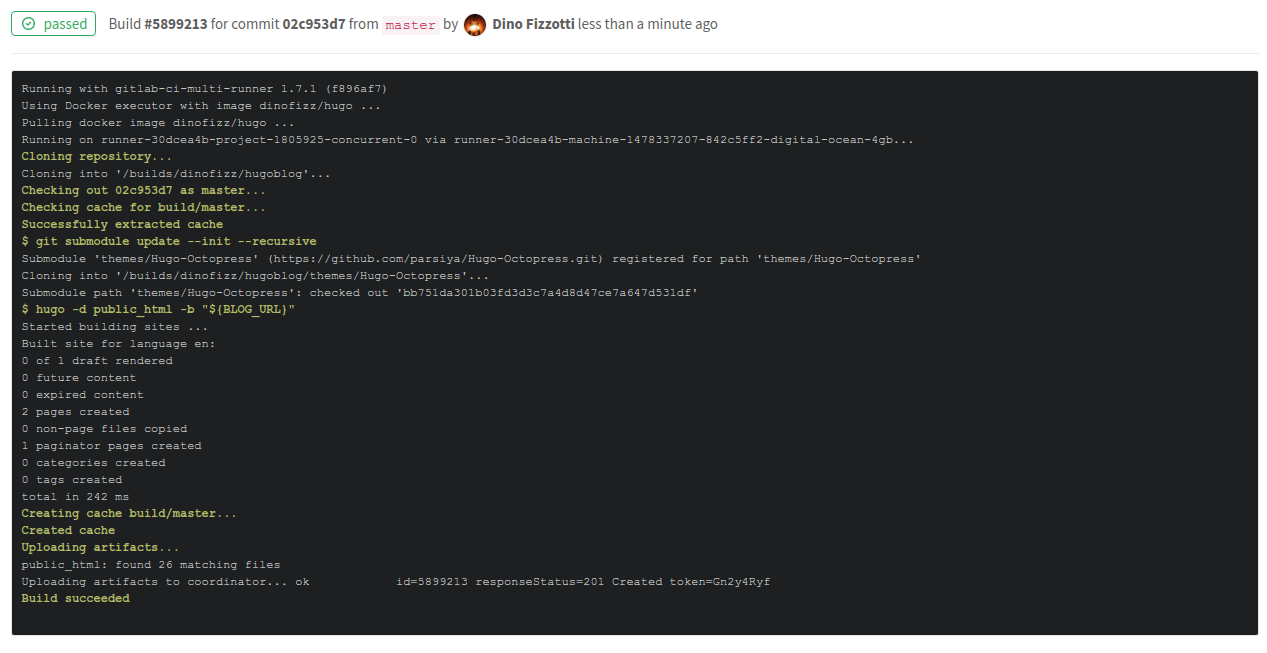
Build stage complete! Now for deploy:
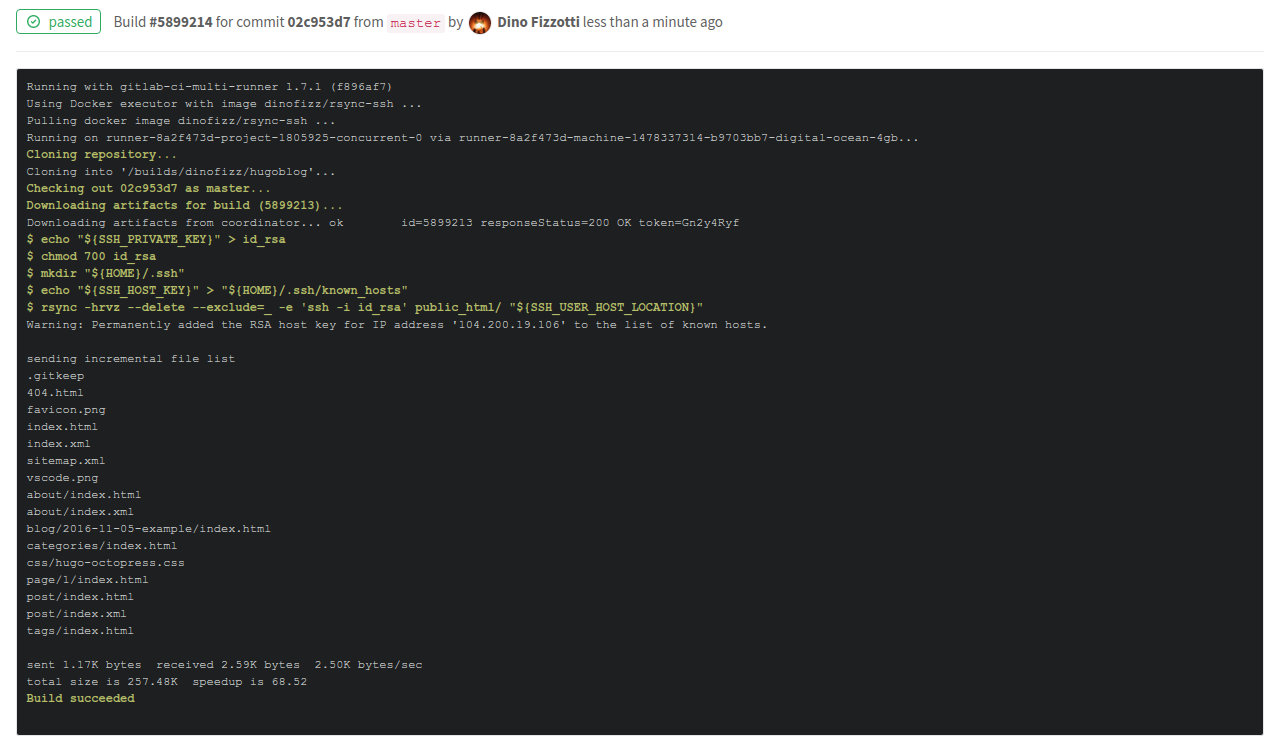
Success :)

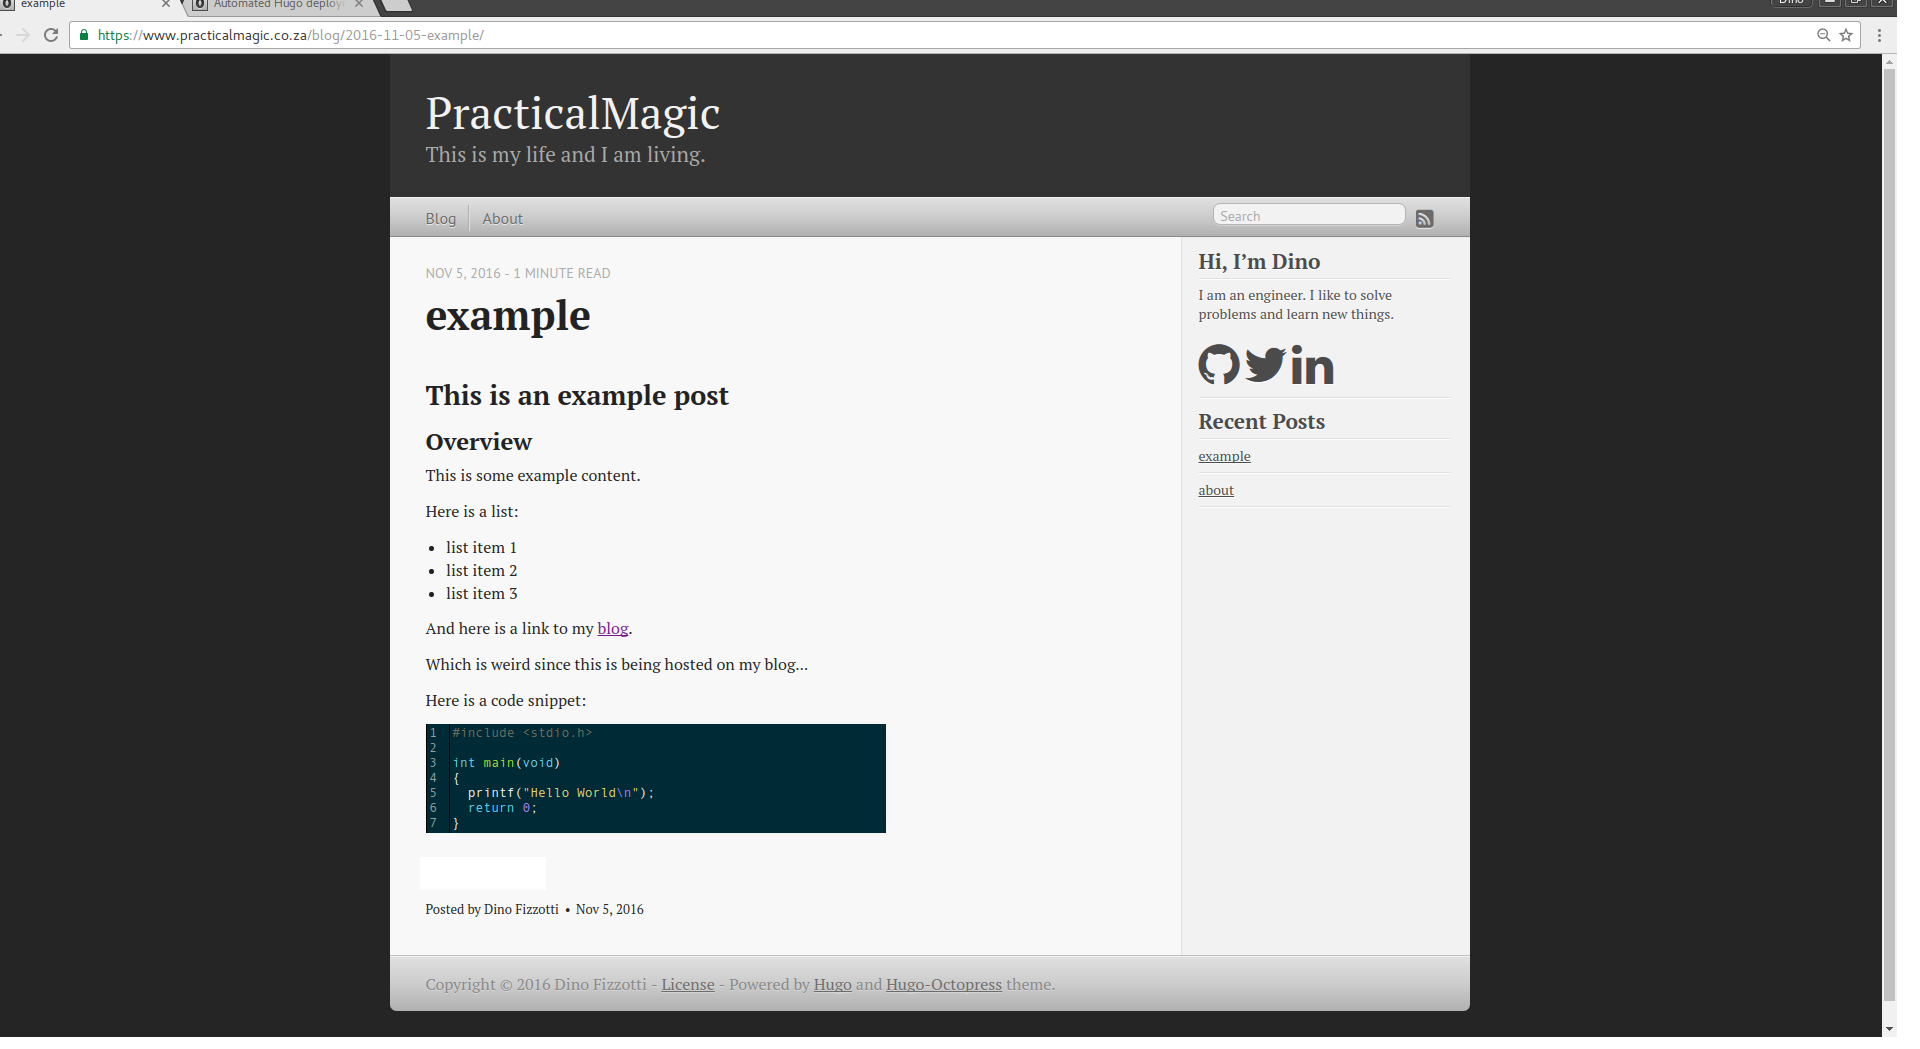
If I now browse to my site I will see a new post has been made available.
And that’s how this blog is built and deployed.