[2022-04-24] See my new post on running mitmproxy on a Raspberry Pi 4 here.
[2020-06-21] I have done another run through of this tutorial on my Rasperry Pi 3, this time with the latest Raspberry Pi OS. Changes made to the tutorial are indicated with a note featuring a timestamp “[2020-06-21]”. Let me know in the comments if you are unsuccessful. I try to re-run everything every 6 months or so.
[2019-08-03] I have since updated this post with new instructions for running mitmproxy on Raspbian Buster, which now includes Python 3.7.
In preparation for a training session I will be giving on public key infrastructure (with a focus on TLS and certificates) I wanted to demonstrate how a transparent “man-in-the-middle” (MITM) proxy works.
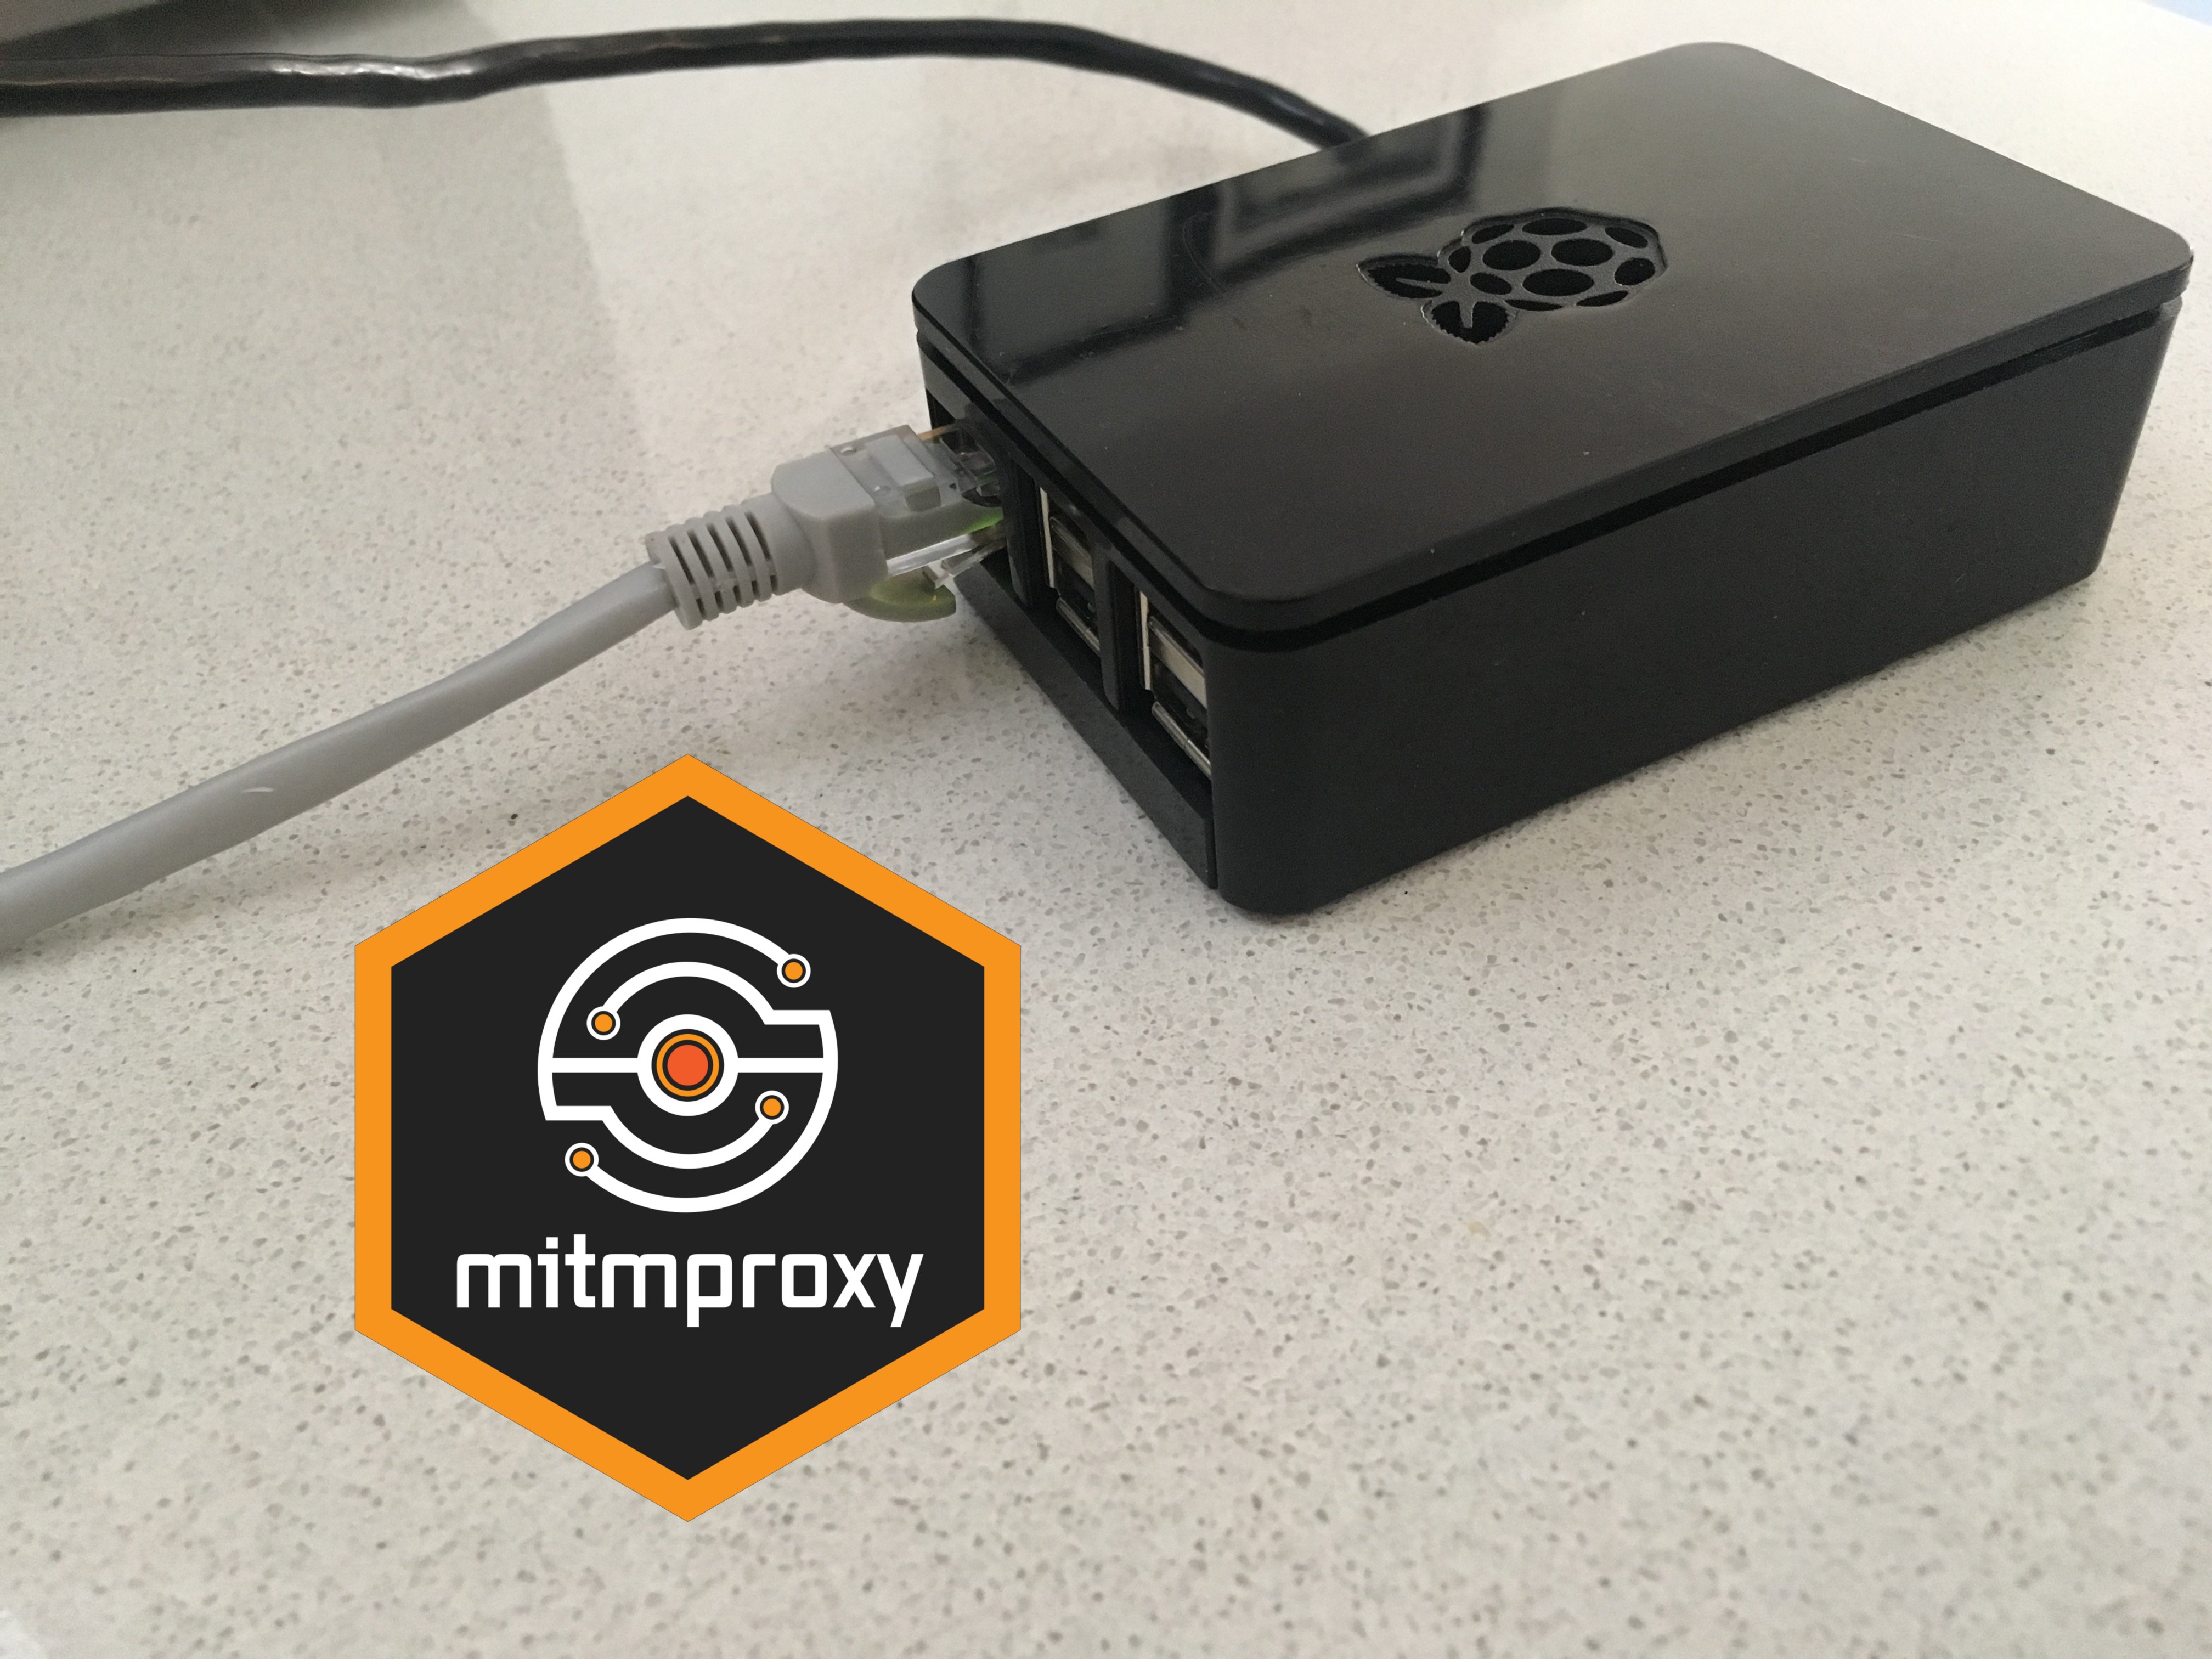
This post walks through the configuration of a Raspberry Pi 3 acting as a Wi-Fi access point, running a transparent man-in-the-middle proxy (mitmproxy), which can be used to sniff HTTP and https traffic on connected devices.
What is a Man-In-The-Middle Proxy
An MITM proxy is a piece of software running on a device (e.g. a Wi-Fi access point or a network router) in between a client (your phone, your laptop) and the server you intend to communicate with. The proxy is able to intercept and parse the information being sent back and forth between the client and the server. It may even manipulate the request being sent, or modify the information coming back.

A MITM proxy need not be “malicious”, although I guess this depends on your view of information privacy and the implementation of IT security controls. The majority of large corporate organizations usually employ a MITM proxy to scan and filter digital traffic moving within their internal network and an outside network (such as the internet). This way they could detect someone moving sensitive information outside of the company’s controlled environment, and also attempt to prevent malware from being installed on staff machines.
An example of a truly malicious MITM proxy would be a Wi-Fi access point that you may connect to thinking it is trustworthy. Perhaps you are in a coffee shop and see on your phone that there is an access point called “CoffeeShop FREE Wi-Fi”. It may even have a “fake” portal with the same “correct” password that was given to you by a (legitimate) barista. The problem is this access point has nothing to do with the coffee shop, it’s actually running on a device in the pocket of a nearby hacker, and now any non-HTTPS traffic that is sent between your laptop and the websites you visit are visible to the hacker, and can be recorded for later inspection. With some effort it is also possible that the hacker can be snooping on your HTTPS traffic. In a variation of this scenario the hacker may have previously compromised the CoffeeShop’s real Wi-Fi access point and could be forwarding the traffic from the access point to his machine. In either case the hacker is able to inspect the traffic between your device and the intended destination.
Components
mitmproxy
The free and open-source proxy software that I have chosen to use in my training demonstration is called simply “mitmproxy”. It has features such as both a command-line and a web interface, as a well as a Python API which can be used to write scripts which can read and modify the requests and responses as the flow through the mitmproxy.
Raspberry Pi 3
I wanted to create a near zero-configuration “plug-n-play” experience for my MITM proxy demo. I should be able to give my training session and demonstrations with as little set up as possible. To satisfy this I opted to install and run mitmproxy on a Raspberry Pi 3 Model B, with the intended operation to be as simple as:
- Plug in a network cable to the Raspberry Pi
- Power on the Raspberry Pi
- Observe a new Wi-Fi access point is available.
- Connect laptops/phones to this Wi-Fi network.
- Observe/modify traffic on the Raspberry Pi as data is sent between the connected devices and the internet.
I could certainly install and configure mitmproxy to run on my laptop, but it would require me to manually manage the network configuration on my laptop between demos.
Using a Raspberry Pi 3 Model B instead of an earlier version has the benefit that it contains two network interfaces: a wired Ethernet interface and an on-board wireless Wi-Fi transceiver. This will allow me to use the Pi’s on-board Wi-Fi as an access point to which client devices can connect. The traffic from these connected devices to the outside internet will then travel over the wired Ethernet connection. Previous versions of the Pi did not have the on-board Wi-Fi, and so a Wi-Fi dongle would have been required to add a second network interface.
Setup
What follows is a walk-through on how to set up and configure mitmproxy on a Raspberry Pi. I am using bits and pieces of various tutorials, blog posts, forum discussions and stack overflow answers. The primary source material for the DHCP and Wi-Fi setup is this Hackaday project from Grégory Paul: Raspberry Pi MITM. The major differences between that write-up and mine is that he is using a Raspberry Pi 2 Model B using 2x Wi-Fi dongles and no wired connection, running an older version of Raspbian, and using a custom script to inject pictures of unicorns in passing web traffic (haha!). My instructions below use updated hardware and OS image, as well as on-board wired and wireless network interfaces in place of his two dongles. In place of the unicorn script I have opted to automatically run the mitmproxy web interface from which I can view the intercepted traffic in a browser on another device.
I recommend that you follow these instructions with the Pi connected to your router with an Ethernet cable, and use a directly connected monitor, keyboard and mouse to enter in the commands and view the results. You can of course set up SSH access, but as you will be messing with network settings you may find yourself unable to connect to the Pi over the network and will need to run commands locally to sort yourself out. You will need internet access available on the Ethernet cable anyway for the MITM proxy operation.
Raspberry Pi Image Installation and Setup
Follow the installation guide and download the latest Raspbian image from the downloads page and flash it to a micro SD card. I used Etcher to flash the Raspbian image to an SD card.
The instructions below were written using Raspbian GNU/Linux 9.6 (stretch)
[EDIT 2019-08-02] The instructions below have been modified and now reflect using a base OS of Raspbian Buster: Version:July 2019, Release date:2019-07-10, Kernel version:4.19
[EDIT 2020-06-21] The instructions below have been modified and now reflect using a base OS of Raspberry Pi OS May 2020, Release date:2020-05-27, Kernel version:4.19
Once the flashing process is complete, pop the SD card into your Raspberry Pi 3, connect a monitor, keyboard and mouse and power it on using the micro USB port. As you will be downloading software I recommend you connect the Pi to the internet using an Ethernet cable. We will be adjusting the wireless settings and so the wireless connection may become unusable while we configure the access point capability.
On first boot you should walk through the short sequence of set-up dialog boxes, setting the location and language, as well as choosing a new password for the default “pi” user account.
[EDIT 2019-08-02]:
- Be sure to set your localisation settings correctly.
- As I was using the ethernet cable for internet connectivity I opted to skip the WiFi setup.
- I did accept the prompt to update the packages at the end of the setup procedure
Raspberry Pi Network Configuration
To turn the Pi into a Wi-Fi access point we will be using both the wired network interface and the on-board wireless network interface. On a Raspberry Pi 3 Model B running Raspbian Stretch these will named as follows:
eth0for the wired network interfacewlan0for the wireless network interface
Note that in the settings below I will be specifying an address range of 192.168.42.* for the custom wireless network. Feel free to use another one of the ranges reserved for private networks (see section 3 of RFC 1918).
Disable NetworkManager
[EDIT 2020-06-21]
I found that NetworkManager was interfering with the network interface IPv4 static IP assignment. To prevent this problem I disabled NetworkManager:
sudo systemctl stop NetworkManager
sudo systemctl disable NetworkManager
Configure dhcpcd
“DHCP” stands for Dynamic Host Configuration Protocol and is responsible for managing device addresses on a network. There exists client and server DHCP software:
The DHCP client software handles how to configure a network interface once it has received a dynamically assigned address - or to force the network interface to use a fixed static address.
- You will be modifying the Pi’s existing DHCP client configuration to assign a static IP address to the
wlan0interface, as this network interface will represent the address of the access point for all other devices that will be connecting to the custom Wi-Fi network.
- You will be modifying the Pi’s existing DHCP client configuration to assign a static IP address to the
The DHCP server software is responsible for handing out network addresses to clients who wish to join the network.
- You will need to install DHCP software on the Pi, as you will need to assign addresses to connecting clients when they want to join the custom Wi-Fi network (see below)
To modify the Pi’s current DHCP client (dhcpcd) configuration, open up /etc/dhcpcd.conf as root:
 # I'm using nano here as it will be installed by default
 # Feel free to use which ever text editor you are most comfortable with.
sudo nano /etc/dhcpcd.conf
Add the following lines at the bottom of the file:
interface wlan0
static ip_address=192.168.42.1/24
nohook wpa_supplicant
This tells the DHCP client to use a static IP address for the wireless network interface, as well as preventing the WPA supplicant hook from launching on this interface. The ever-useful Arch Wiki page for dhcpcd has some more information on this.
Install isc-dhcp-server and hostapd
Two pieces of software which will be working with these interfaces and are required for the Pi access point are:
isc-dhcp-server: Responsible for assigning the devices that will be connecting to the access point IP addresses.hostapd: Responsible for managing the authentication of devices to the access point.
To install this software, open up a terminal on the Pi and issue the following command:
sudo apt install hostapd isc-dhcp-server
Configure isc-dhcp-server
Open up the /etc/dhcp/dhcpd.conf file:
sudo nano /etc/dhcp/dhcpd.conf
Remove the comment on the line stating authoritative;:
# If this DHCP server is the official DHCP server for the local
# network, the authoritative directive should be uncommented.
authoritative;
And then either just after authoritative; or at the end of the file, add the following lines:
subnet 192.168.42.0 netmask 255.255.255.0 {
        range 192.168.42.10 192.168.42.250;
        option broadcast-address 192.168.42.255;
        option routers 192.168.42.1;
        option domain-name "local";
        option domain-name-servers 8.8.8.8, 8.8.4.4;
}
These lines configure the DHCP server working on the wireless interface to hand out IP addresses beginning from 192.168.42.10 through to 192.168.42.250, with a broadcast address of 192.168.42.255, as well as specifying the router address to be 192.168.42.1 (note that this is the same static IP address as was configured on the wlan0 interface above).
Next you will need to open up the /etc/default/isc-dhcp-server file:
sudo nano /etc/default/isc-dhcp-server
Change the “INTERFACESv4” line to contain wlan0, and comment out the “INTERFACESv6”:
INTERFACESv4="wlan0"
#INTERFACESv6=""
Configure isc-dhcp-server systemd entry
After installation the isc-dhcp-server will automatically run after boot, however if it attempts to start before the network interface is ready it will fail - and not attempt to start again. I obviously wasn’t the first one to come across this issue and found this StackOverflow answer which explains exactly what you need to do to resolve this issue. It is explained quite explicitly and so I won’t reproduce it here.
Configure hostapd
Next you will need to edit the hostapd configuration file - but first we need to copy and extract an example configuration file within which we will make our changes:
[EDIT 2019-08-02] The code snippet below has been updated to reflect the that the example config file is no longer in an archive file.
cd /etc/hostapd/
sudo cp /usr/share/doc/hostapd/examples/hostapd.conf .
Open this file up in the text editor:
sudo nano /etc/hostapd/hostapd.conf
You will need to find the lines in the file which set the configuration variables below. In some cases you will need to modify the value and in others you will need to un-comment and modify the value:
[EDIT 2020-06-21] Previous versions of this post suggested to add a driver=nl80211 entry. This has been removed.
interface=wlan0
ssid=mitmdemo
macaddr_acl=0
auth_algs=1
wmm_enabled=0
wpa=2
wpa_passphrase=password2600
wpa_key_mgmt=WPA-PSK
wpa_pairwise=TKIP
rsn_pairwise=CCMP
You can set your own name for the SSID and your own pass phrase
Note: As pointed out in the comments, you will need a passphrase of 8 and 63 characters - Thanks David Chatting!
Next you need to open the /etc/default/hostapd file:
sudo nano /etc/default/hostapd
And un-comment the line specifying DAEMON_CONF and edit it such that it reads like this:
DAEMON_CONF="/etc/hostapd/hostapd.conf"
[EDIT 2019-08-02] While re-running the installation of hostapd on Raspbian Buster I noticed that the hostapd service was not starting up as it was masked. Run the following commands to ensure that it is unmasked and enabled:
sudo systemctl unmask hostapd.service
sudo systemctl enable hostapd.service
mitmproxy Installation and Setup
[EDIT 2019-08-02] A previous version of this post had detailed instructions for downloading, compiling and installing a suitable version of Python 3 for use with the latest version of mitmproxy. As this guide has now been updated to be run with Raspbian Buster this is no longer necessary as Buster includes Python 3.7.
I recommend installing the latest version from the Python package index.
sudo pip3 install mitmproxy
Once this has completed you should be able to verify that mitmproxy is installed correctly with the following command:
$ mitmproxy --version
Mitmproxy: 5.1.1
Python:    3.7.3
OpenSSL:   OpenSSL 1.1.1d  10 Sep 2019
Platform:  Linux-4.19.118-v7+-armv7l-with-debian-10.4
Configure mitmproxy to run on start-up
Inspiration taken from this forum post: https://discourse.mitmproxy.org/t/mitm-proxy-on-ubuntu-startup/943/2
The last bit of configuration for mitmproxy is to set it up such that it runs at start-up. As I will be using mitmproxy as part of a live demonstration of a man-in-the-middle proxy I will be running the bundled mitmweb application. mitmweb runs a web app which can be viewed on a browser, from which a user can then view all the intercepted HTTP requests and responses.
To launch mitmweb open up a text editor and save the following contents in a file at the location /home/pi/start_mitmweb.sh:
[EDIT 2019-08-02] The script has been updated to refer to mitmweb as installed as a global package and no longer a package specific to the pi user.
[EDIT 2020-06-21] Thanks to Agustin Scaz for pointing this one out in the comments. The script has been updated to refer to mitmweb using the --web-host argument in place of the older --web-iface one.
#!/bin/bash
mitmweb --mode transparent --web-port 9090 --web-host 0.0.0.0 &>> /var/log/mitmweb.log
Explanation for the command line arguments:
- --mode transparent : this runs mitmproxy in transparent proxy mode, which forwards the requests and responses on to their intended destinations after being inspected.
- --web-port 9090 : this tells the mitmweb application on which port to expose the web interface.
- --web-iface 0.0.0.0 : this tells the mitmweb application that the web interface should be visible and accessible on the Pi’s LAN IP address.
We will need to make this script executable by executing chmod a+x /home/pi/start_mitmweb.sh.
Next we need to create a systemd service file…
sudo nano /etc/systemd/system/mitmweb.service
… with the following contents:
[Unit]
Description=mitmweb service
After=network.target

[Service]
Type=simple
User=root
ExecStart=/home/pi/start_mitmweb.sh
Restart=on-failure
RestartSec=5

[Install]
WantedBy=multi-user.target
Enable this service to run automatically on start-up by running the following commands:
sudo systemctl daemon-reload
sudo systemctl enable mitmweb.service
Network traffic configuration
Modify iptables rules
To correctly intercept and forward traffic between the wireless interface and the wired interface you will need to issue the following commands to set up the “iptables” firewall rules:
sudo iptables -A FORWARD -i eth0 -o wlan0 -m state --state RELATED,ESTABLISHED -j ACCEPT
sudo iptables -A FORWARD -i wlan0 -o eth0 -j ACCEPT
sudo iptables -t nat -A POSTROUTING -o eth0 -j MASQUERADE
sudo iptables -t nat -A PREROUTING -i wlan0 -p tcp -m tcp --dport 80 -j REDIRECT --to-ports 8080
sudo iptables -t nat -A PREROUTING -i wlan0 -p tcp -m tcp --dport 443 -j REDIRECT --to-ports 8080
Next save the iptables configuration to a file:
sudo sh -c "iptables-save > /etc/iptables.up.rules"
Now we will modify a script to issue a command which will restore these rules at start-up. Open up the “rc.local” file:
sudo nano /etc/rc.local
And enter the following statement before the “exit 0” line at the end of the file:
iptables-restore < /etc/iptables.up.rules
Enable traffic forwarding
By default the operating system will not allow IP traffic to be forwarded from one network to another. To change this behavior run the following command:
sudo sysctl -w net.ipv4.ip_forward=1
And then to ensure that this setting is persisted between boot cycles, open the /etc/sysctl.conf file:
sudo nano /etc/sysctl.conf
And find the commented line which says “#net.ipv4.ip_forward=1” and uncomment it:
 ...
# Uncomment the next line to enable packet forwarding for IPv4
net.ipv4.ip_forward=1
Shutdown / Reboot
If you have made it this far you should be ready to shutdown or reboot the Pi - the next time it starts up it will bring up a wireless access point and run the transparent MITM proxy!
Demo
You will need a phone or a laptop to connect to the access point and another laptop to view intercepted traffic. I am using an iPhone to connect to the access point and my laptop to view the intercept traffic.
Make sure your laptop is on the same network as that where the Raspberry Pi will be plugged into via the Ethernet cable.
Observe HTTP traffic
Run an Ethernet cable from an available port on your router through to the Ethernet port on your Raspberry Pi 3.
Plug in the micro USB cable.
You should see the red (power) and green (activity) LEDs on the Pi light up. The lights in the LAN port should also soon start blinking.
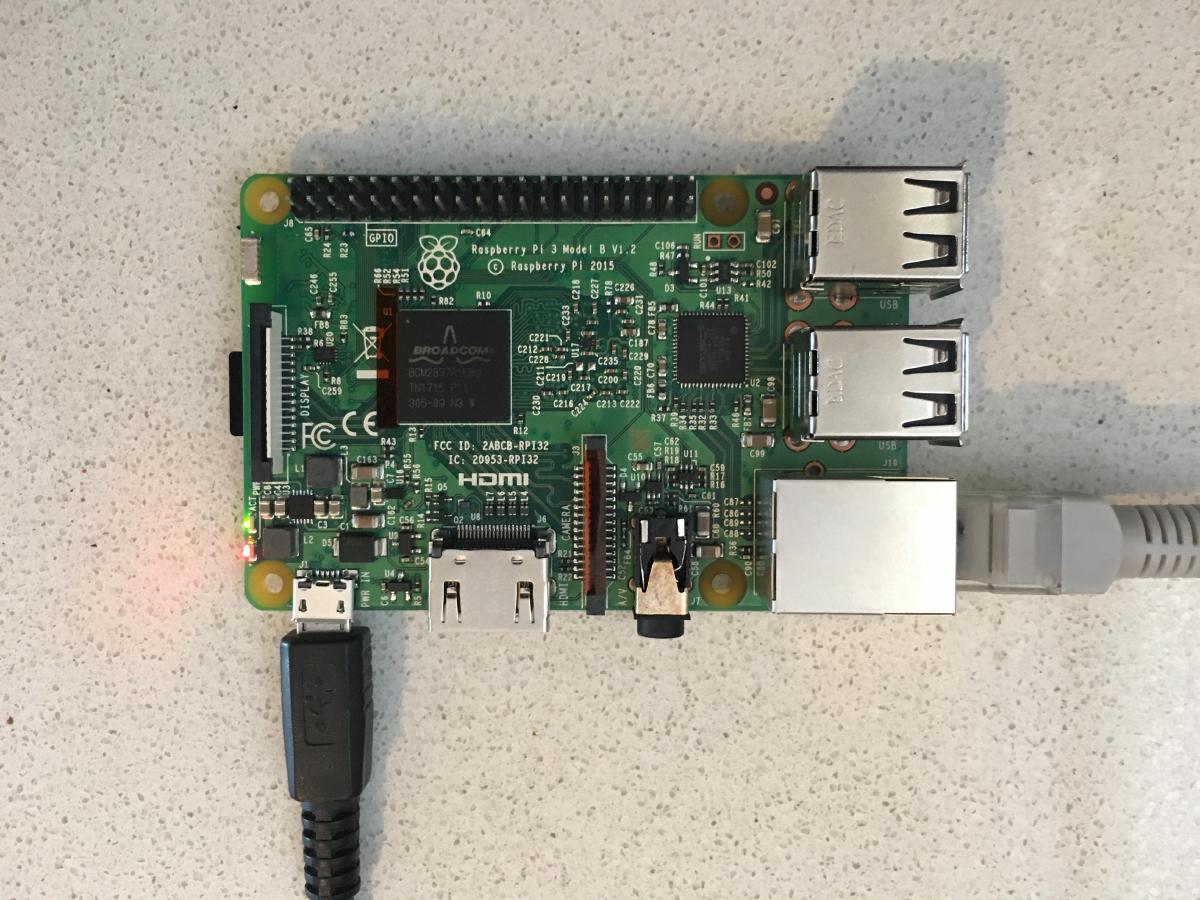 Raspberry Pi 3 plugged in
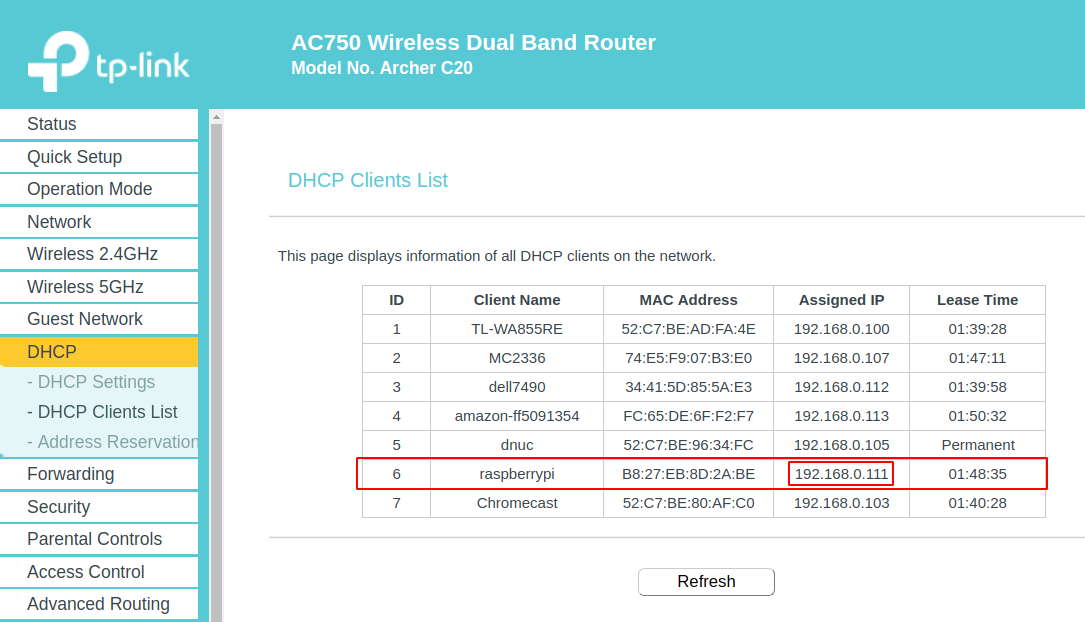
Use your router’s admin console (or maybe a search with nmap) to determine the IP address of the Pi on your network.
 Admin console of router showing Pi LAN IP address
Open up a browser tab on your laptop and navigate to http://<ip address of RPi3>:9090/
- You should see the
mitmwebapplication running in the browser.
- You should see the
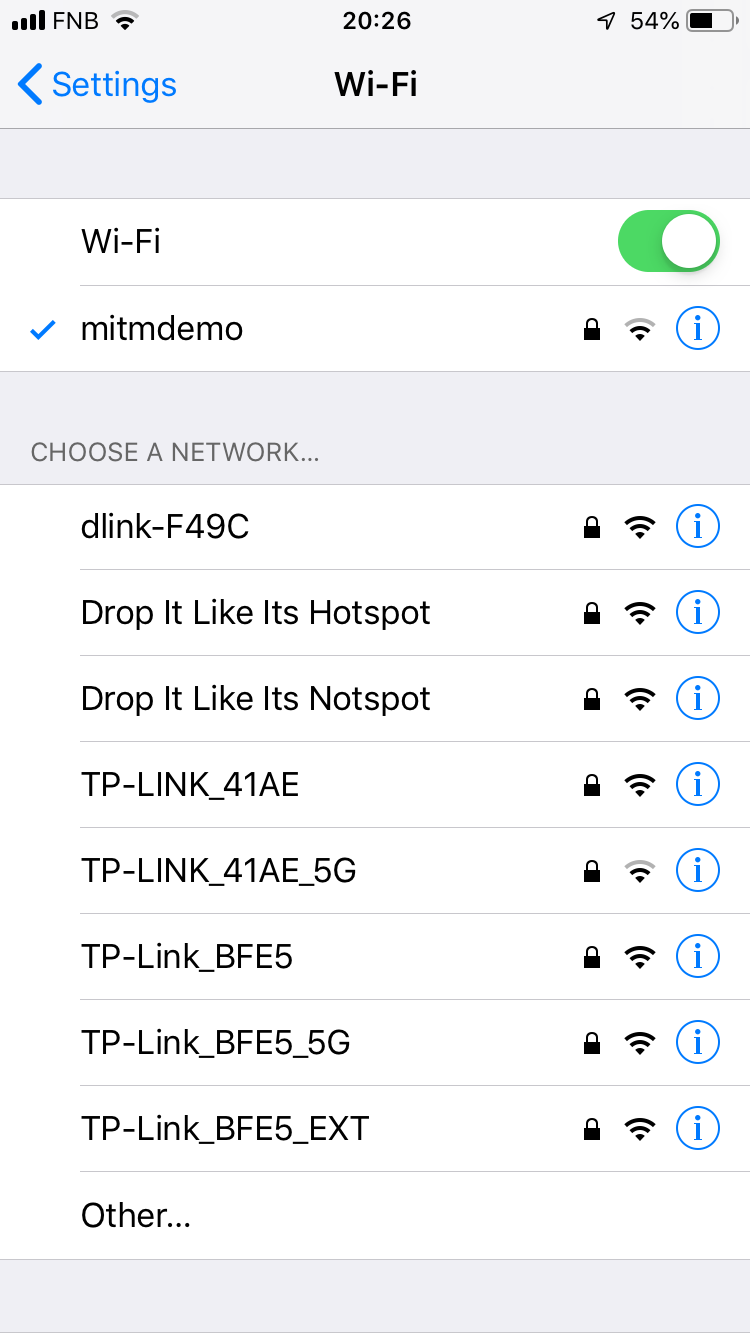
Wait a few seconds, and then use your phone to search for a new Wi-Fi access point.
- You should see one called “mitmdemo”.
Connect to the “mitmdemo” access point and use the password “password2600” to join the network.
 mitmdemo Wi-Fi network
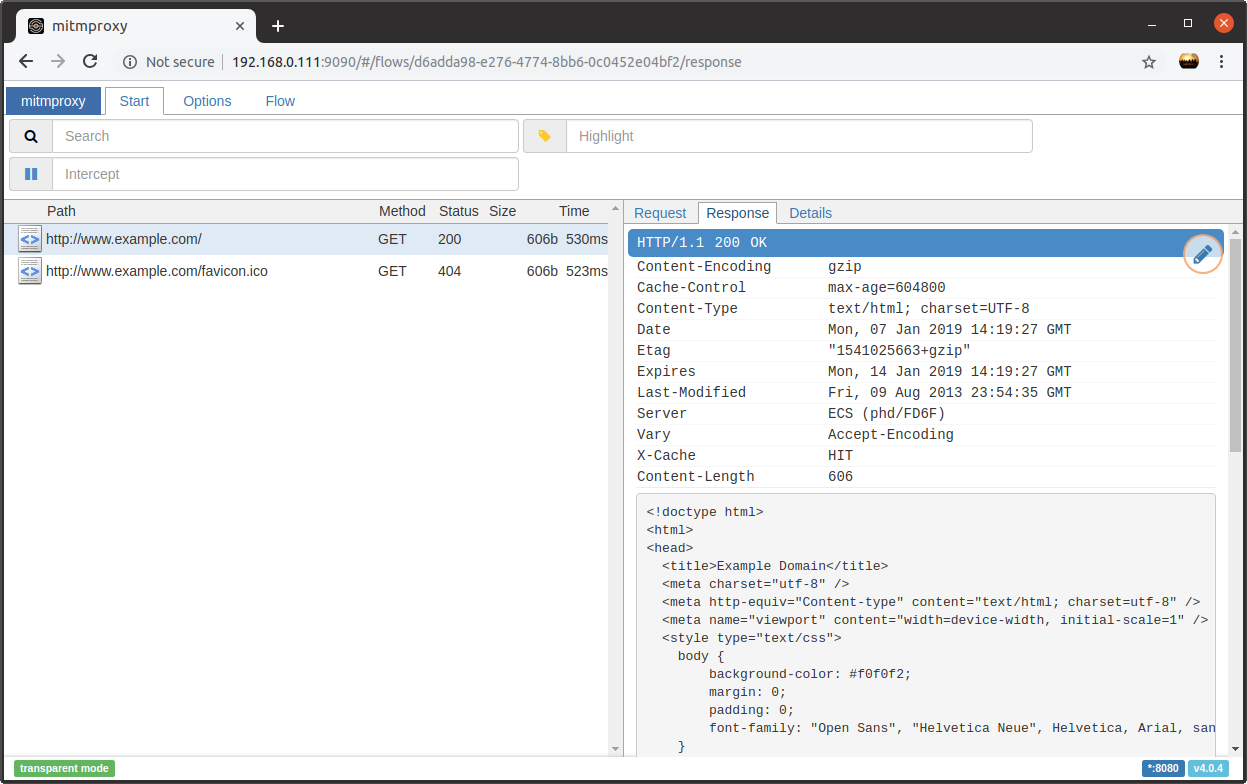
Once connected, open up a web browser and navigate to http://www.example.com (make sure it is http and not https).
Observe the traffic in the
mitmwebapplication running in the laptop browser tab.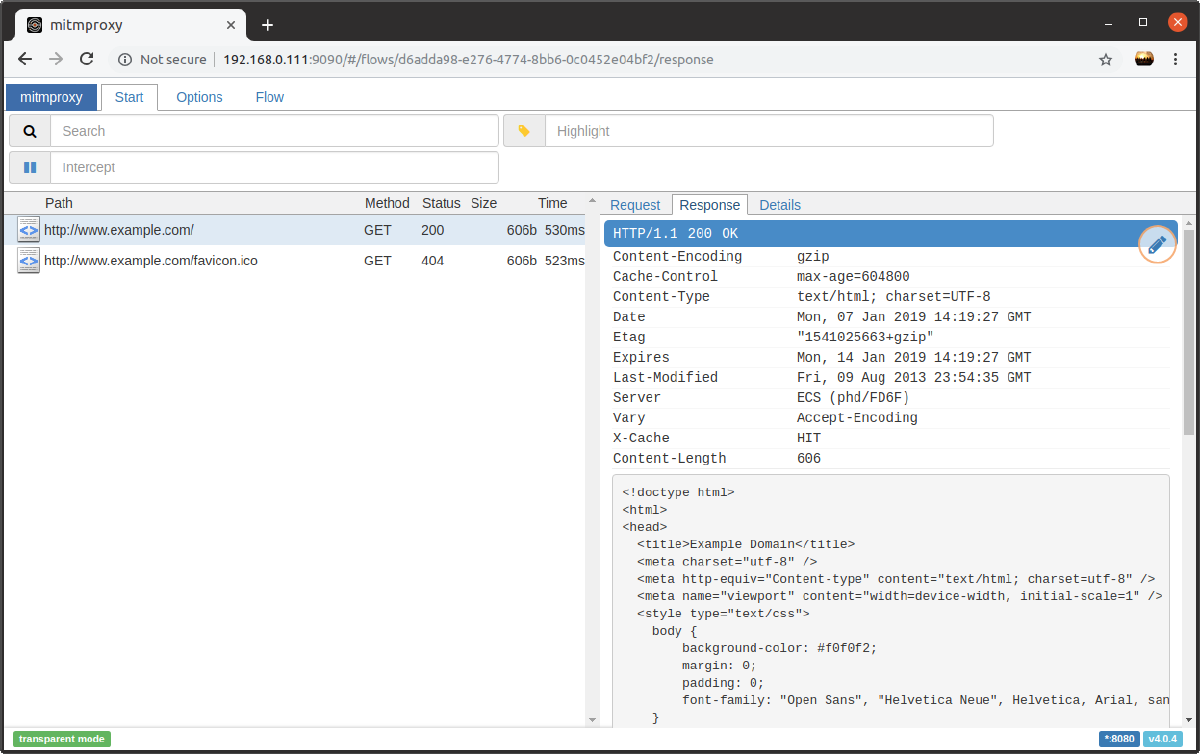 mitmweb intercepting HTTP traffic
If you attempt to view an https website you may receive a warning in your browser.
 Warning when browsing https website


Observe HTTPS traffic
While you are still connected to the “mitmdemo” access point, navigate in your phone’s browser to http://mitm.it
You will observe a website giving you a choice of links which will download the root certificate for the relevant platform.
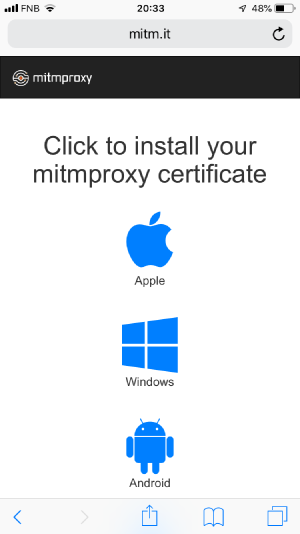 http://mitm.it
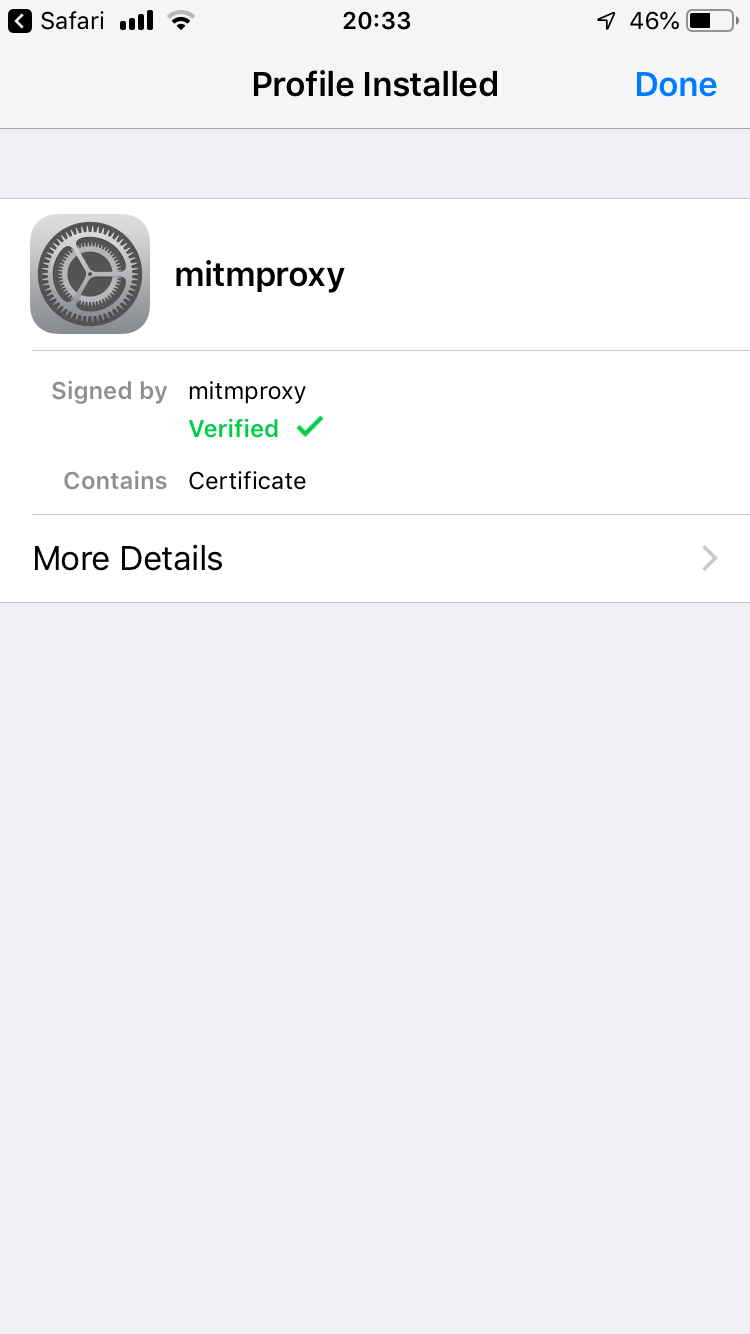
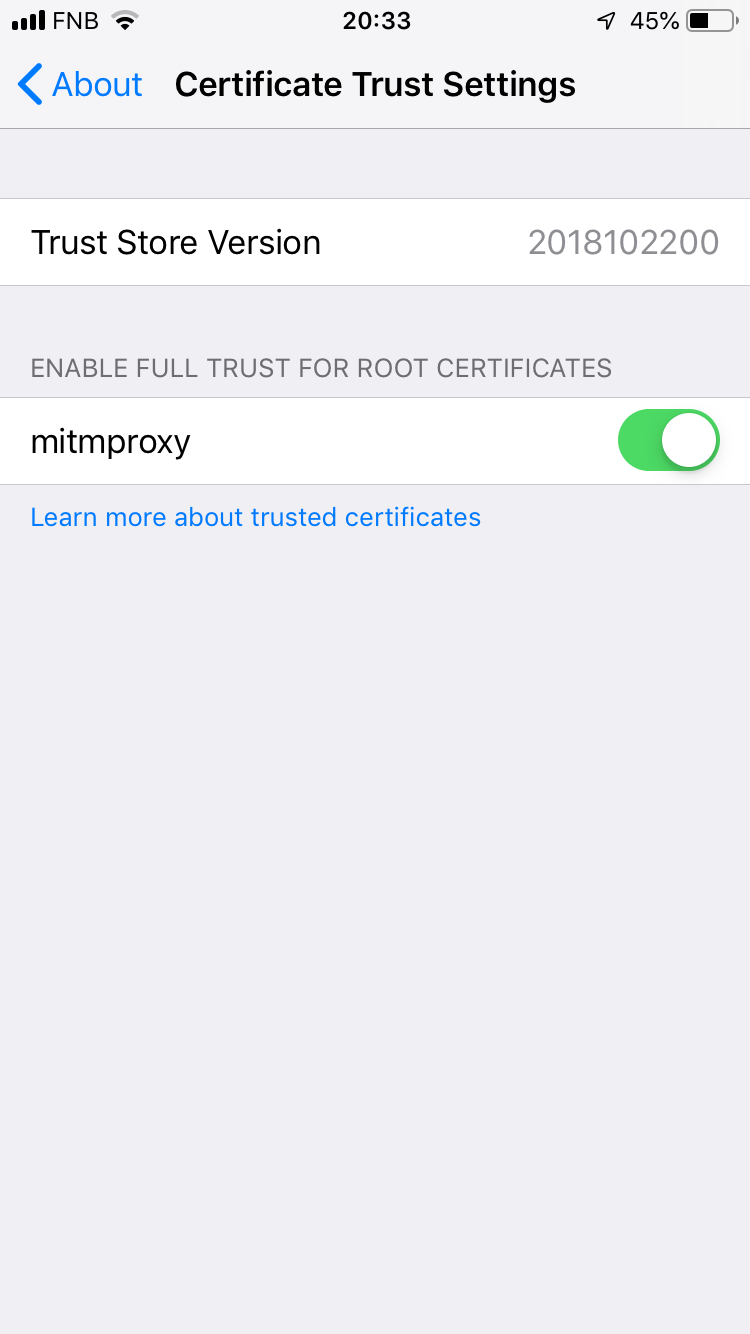
Tap the icon which resembles the platform you are currently using. It will download a certificate which needs to be installed into your device’s trusted store, the instructions of which vary from platform to platform. See below some screenshots of the iOS experience.
- Note for iOS: After the certificate has been installed you will need to manually activate it by going to Settings -> About -> Certificate Trust Settings and toggling on the certificate for “mitmdemo”.
Once you have installed and trusted the certificate, you should be able to visit https websites and view the requests and responses without any warning on your device.
 No further warnings fro https content


I recommend that you remove the certificate from your device’s trusted store once you have completed the demonstration.
Conclusion
I hope that you found this interesting and perhaps learned something from my experience in creating a portable and demo-friendly man-in-the-middle proxy! Let me know in the comments if you have any questions.